Building a Snow Trench for Winter Camping
If you are camping in the winter, a shelter made of snow is tremendously warmer than sleeping in a tent. Different types of snow allow different kinds of snow structures to be built. One very practical shelter for when the snow is deep is a snow trench. How much time you have, if a storm is expected, and if you are going to set up a base camp are considerations. A covered snow trench can made in a couple of hours, and protect you from 40 below temperatures.
The snow has to be 3 or 4' deep for this type of shelter, or wind packed snow also works. You need a snow saw and a snow shovel to make a snow trench, each of which are tools you would normally carry in the winter.
The first thing you do is compact the snow in an area where you are going to make the trench. To compact it you gently walk on it with skis or snowshoes, then you let is settle for an hour. That hour is a good time to cook some food or get hot water. After it is compacted, you don't walk on it again, which will cause fractures in the compacted snow.
Below, preparing a site for a snow trench.

After the snow has settled for an hour, you cut a pit to stand in, which will be the start of the trench. You can cut steps to get into and out of the pit. One side of the pit should the size that you want your blocks to be, it should be flat. You want blocks to be as big as you can lift them, which will depend on the snow you have. Standing in the pit you have dug, you face the smooth side and cut your first block. You do this by cutting the sides of the block first, to about 6 or 8" thick, then you slice along the bottom of the block, thenyou clear wedges along the sides and bottom of the block, so it will hinge toward you without snagging on the sides. The cut along the bottom will as deep as the length of the snow saw. Lastly, you cut vertically along the back of the block. If things go right, the block will drop down a short distance, and you will hear it drop half an inch or to. Tip the block towards you, and lift it out and set it to one side of the trench.
Below: Bryan Wilkins has cut a few blocks and set them aside.

Repeat the process of cutting and removing blocks, and work back into your compacted snow area. When you have extended the trench about 10 feet, you will have a lot of blocks sitting to the sides of the trench. While cutting, no one should walk on the compacted snow, or they might crack the snow structure. Below, Bryan has cut enough blocks and has enough blocks to start forming the roof.

To form the roof, you start at the far end of the trench and lean two blocks in from the sides of the trench to meet in the middle of the trench, forming an inverted V shaped roof. Trim the edges of the blocks so they fit together and have good contact on the sides of the trench. You stagger the side edges of the blocks, so the next block you place will be supported by the last block you placed. You work from the far end of the trench back to the pit you started at. Below Bryan has formed most of the roof, and has plenty of blocks to use. The placement of the blocks seems a bit precarious when they are first placed, but after a few minutes the snow welds together. By morning a person can stand on the roof and it won't cave it.

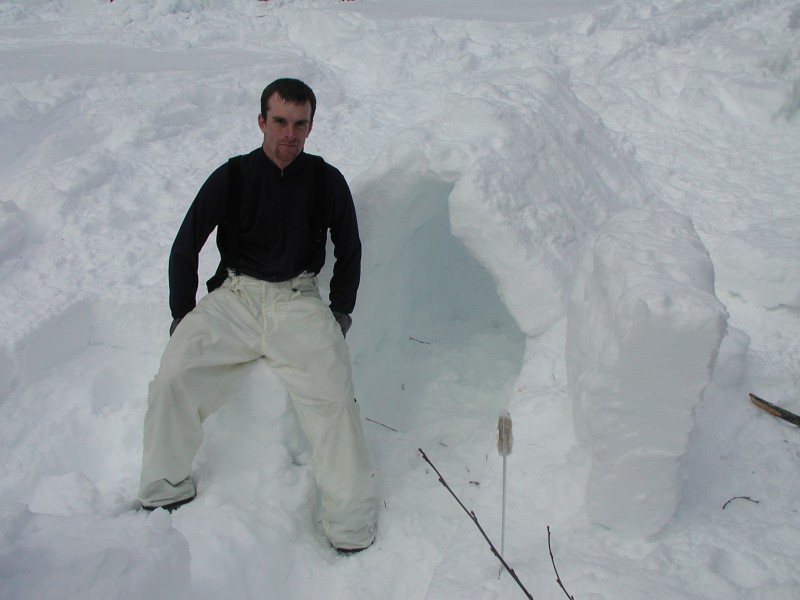
When the roof is formed, the trench walls will be straight, as shown below. The walls can now be cut to taper outward toward the bottom, to give you more room at the ground level. Most trenches are built for a single person, but they can be wide enough for two people. Multiple trenches can start from the same pit, so they radiate out from the pit. In that way people can talk to each other at night.

If you have two people building trenches, you can use a three piece roof span, as shown below. That is me inside the trench in 1974 on the first snow trench I ever built.

Once the roof is on, you can use a shovel to toss loose snow on the roof, and fill in gaps in that way. You can also cover the upper part of the door with a block of snow, to keep heat in. You can also use your hands to smooth the walls and ceiling, which will reduce flaking of snow onto your sleeping bag. You can put a heat source such as a candle or stove in the shelter, cover the door, and let the heat melt some flakes on the interior walls, also to reduce flaking later. Then lay plastic on the floor, put down one or two sleeping pads, a sleeping bag, and its ready to sleep in. The snow is great insulation, and it could be 20 degrees warmer inside the shelter than outside. You can drape a plastic sheet over the door to keep more heat in.
Below are some more or less finished snow trenches.