Making a Folding Knife From a Kit
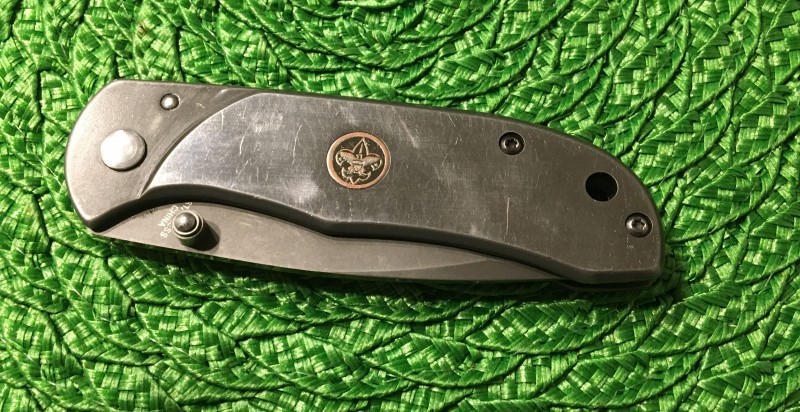
My go-to knife for backpacking of late has been a lockback folder which our scout troop gave me. It is etched with the words "Bob - Thank you for your Service to Troop 100." What a nice gesture, and it turned out to be a fantastic little knife which is a pleasure to carry. Its perfectly adequate for any task on a backpack. Based on my experience with the BSA knife, I wanted to try my hand at making a folding knife, so I bought a folding knife kit from knifekits.com. The model was the "Sheriff."
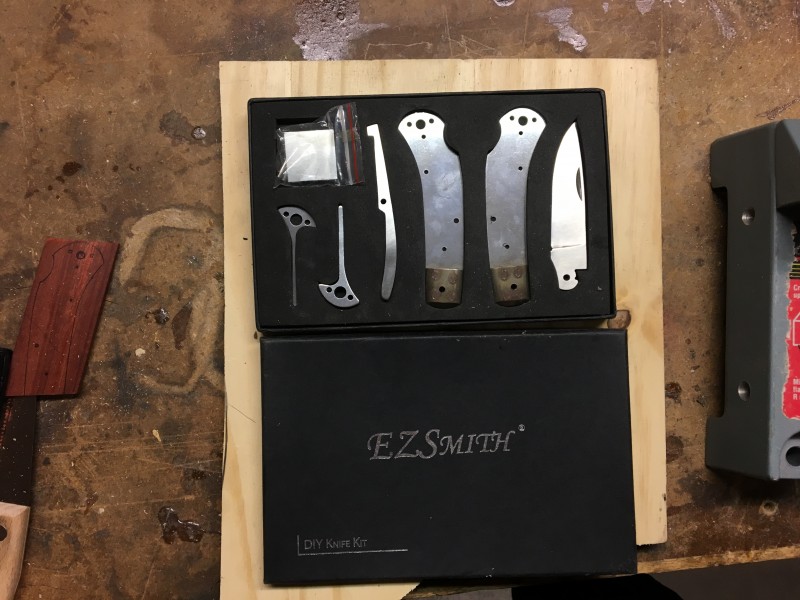
It came with no instructions at all, and the pdf instructions for other models were not clear on the details of putting it together. They more or less said: cut out handle material, drill holes, assemble the knife using pins, peen the pins: done. After making many mistakes, chiseling off 3 pairs of scales, drilling out or cutting off a set of pins, I made a workable knife with lots of small issues. I thought I'd document the detailed steps I finally figured out by trial and error.
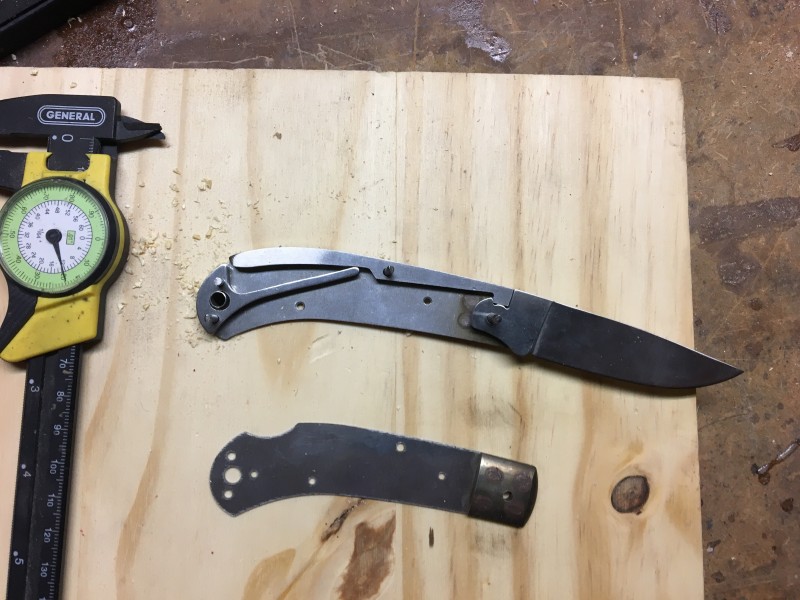
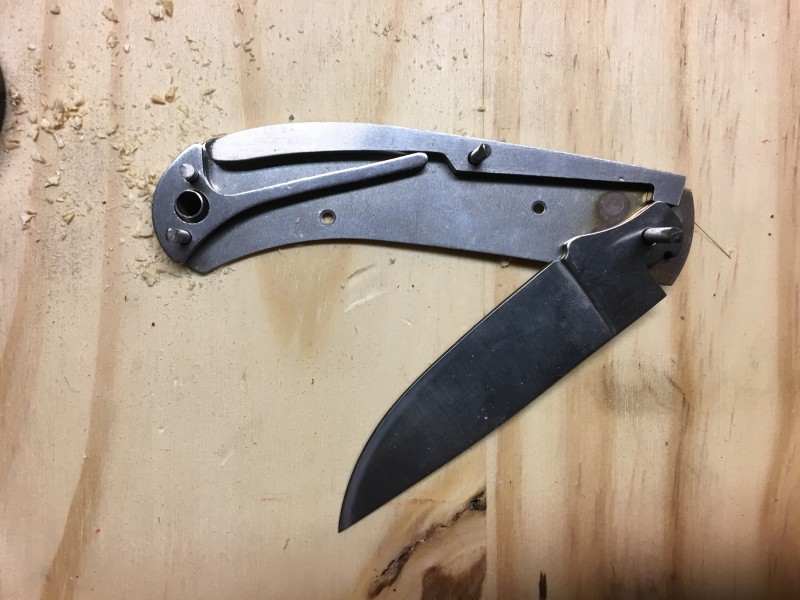
First I did a mockup assembly on a piece of wood, to see how the pieces fit together.


I measured the diameter of the pins, because the pivot pin, spring pins, and liner pins were all different diameters, and they didn't send extra pins for the pivot and spring pins. I cut some oversized scales in a cutoff saw, so I would have a clean edge of wood to put against the edge of the bolster. I traced an outline of the liners on the wood, so I would know where to put the epoxy. I glued the scales to the liners, and let the epoxy dry overnight.

Next I drilled the pin holes. If you drill from the metal side and come out the wooden side, the bit will splinter the wood. I lost a pair of scales that way and had to start over. I finally figured out that if I drilled from the metal side toward the wood, I could use the depth stop on the drill press to have just the tippy tip of the bit make a little dimple on the wood side, then I could drill from the wood side toward the metal. Then I cut off the excess wood with a hack saw. If you cut off the excess wood with a large tooth saw, it is easy to split the wood, but the small teeth of the hack saw don't put too much stress on the wood. Then I sanded the wood to the edge of the metal, and shaped the wood to roughly the final shape of the handles. I used a rasp to remove a lot of excess wood, then drum sander bits that fit in the drill press, and they were great. One of the drum sander bits fit into the blade release recess, and allowed those surfaces to be finished sanded to 400 grit before the parts were assembled. The wood is from a block of mountain mahogany a friend gave me, from the Owyhee Mountains of Idaho.

Next some of the holes were delicately countersunk with a cone shaped bit, and the pieces were assembled with the pins. Peening the first set of pins was a disaster. The second set of pins worked better. I learned that the pins have to be filed very flat, and stick out just a tiny bit from the scales or the pivot. I also learned that the shim material in the kit was crap, and I came up with a 0.007" shim from a set of feeler gauges I had. I peened the backspring pin first, next the pivot pin, and last the pins on either side of the lanyard hole. The pins were then filed flush with the surface of the wood, and sanded with the wood. If they are forced through the holes, the pins can easily split the wood (which I did, and had to start over). The pins around the lanyard tube were taped down to hold them in place.
Peening is best done by many light taps with a 4 oz ball peen hammer, with which the edges of the pin are tapped, with about 6 taps to work around the circumference of the pin, followed by one tap in the center to spread the pin. You partially peen one side of a pin, flip it over and partially peen the other side, flipping over maybe 15 times back and forth. When peening the pivot pin, if it is peened too much, the blade is locked or hard to open. If it is peened too little, there is side to side play in the blade. I peened the pivot with the 0.007" shim around the pivot pin until the blade got tight, then I took the shim out, and gave it a few taps on each side, then tried the blade for smooth opening. If it gets too tight, it is ruined. I had to drill out one pivot pin and start over. I used a 0.004" shim on the backspring pin, because if that is too tight it can lock the whole thing up (did that). After three sets of scales and 2 sets of pins, the first knife came out OK, the second one quite a bit better as far as the pins go. Below are the first and second knives I made using the Sheriff kit.

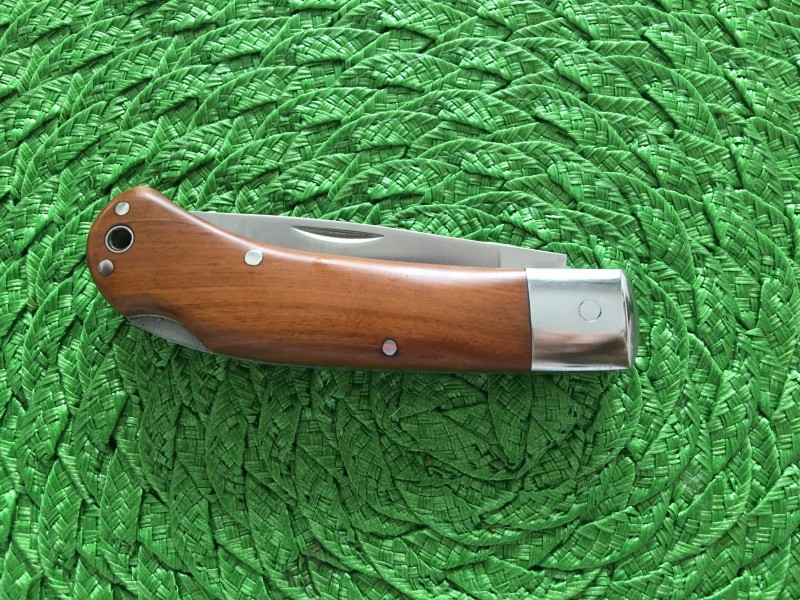
Above is the second one I made, which has better pins than the first one.