Depth Of Field Blending
Marc Dilley, of Marc Dilley Photography has been nice enough to try to teach me a little about the technical end of photography. Here are his thoughts on how to get incredible depth of field in a photo, such as that seen in the photo below.
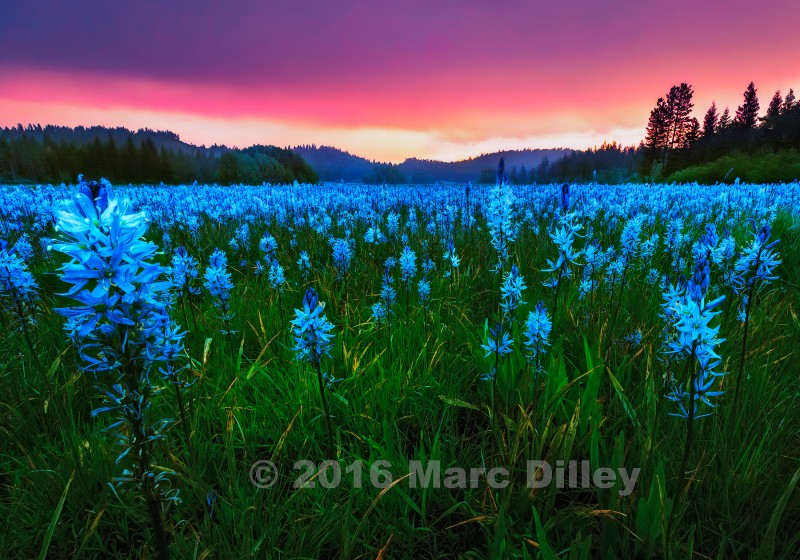
Photoshop layers can also be used to improve the depth of field in the final image, in addition to improving the dynamic range. In this image, shot pre-dawn in a meadow of Camas Lilies in North Central Washington, I wanted all of the flower heads in the field to be in razor-sharp focus, as well as the horizon. The flower head at left is very close to my lens, so getting it in focus meant most everything else in the scene would be blurry. An additional complication was that the meadow was much darker than the sky, or in other words, the dynamic range of the scene was way beyond the capability of the camera sensor.
To solve these issues, I worked on one at a time:
1) Depth of field: With the camera rigid on a tripod, and the controls set to expose well for the meadow (petals on the high side, but not too bright, washing out the color), I took a series of shots all at the same exposure, varying only the focus distance. For this particular subject I shot five times, each shot focused slightly more forward of the last. The final shot was at infinity.
2) Dynamic range: Sky exposures - if the sky is clear, one shot may be enough, but if it is an active sky with lots of clouds and sun flecks, multiple exposures may be needed. For this image I got by with one... but I hedged my bets as always and bracketed the exposures. Note that if you only shoot one exposure, and in processing you find that you need more exposure latitude, you may be able to "multiple process". This technique simply treats your single exposure as though it is many exposures: you process it once in Camera Raw and shunt it into Photoshop, then return to Bridge and process the file in Camera Raw again to your new requirements and shunt this second copy to Photoshop as #2 in the stack. And so forth.
Back in the office: Take all of the meadow exposures and process them exactly the same. At this point you will want to get color temperature, tint, exposure and petal color reasonably close. As always, process conservatively; at this point your shots should be saturated but on the low side of contrast. If you are familiar with histograms, you want neither right or left toes touching the vertical end bars of the graph. Once you are satisfied, return them to Bridge.
Back in Bridge, highlight all of them. Then choose Tools>Photoshop>Load files into Photoshop layers. All of your exposures will appear in a stack in Photoshop. Highlight the entire stack (click on the lowest one, hold down the Shift key and click the top layer). Then go to Edit>Auto Align Layers...>Auto Next, Edit>Auto Blend Layers>Stack Images Photoshop recognizes out-of-focus pixel clusters, those with the greatest circles of confusion, and masks them out. Once you are satisfied with the result, flatten the stack. You can then return to Bridge and process the sky exposure(s) and bring them into Photoshop as a layer in the Lilies file. Before proceeding, make positively certain that you are done with your sky file in Camera Raw, because the next step will permanently sever the bond and there will be no returning. Reason: the flattened Lilies layer and the Sky layer must be Auto-Aligned before they can be blended together. However, Smart Objects cannot be aligned, so they must be rasterized first, which strips them of the ability to return to Camera Raw. To do this, simply hover over the comment (right-hand) part of the layer banner, right click and choose rasterize layer from the menu. Add a mask, and you now have all of Photoshop's tools at your command.